Author

admin_farm

Browsing

There are two causes of salt poisoning in pig, these are

  1. Water Deprivation

Salt poisoning by water deprivation is the most common poisoning to be seen in swine.

This occurs in housed pigs whose source of water runs dry without the farmer noticing, the low water intake by pigs makes the normal salt in the diet toxic and affecting the brain tissue and hence the functioning.

  1. Excess Salt Intake

Salt poisoning is also caused by excess intake of salt; the higher the salt intake, the faster the development of toxicity.

Normal levels of salt in the ration vary between 0.4 and 0.6% and even at these levels water deprivation can result in toxicity after 48 hours.

The higher the level of salt in the diet the shorter is the period of water deprivation before signs are seen. However in the presence of ad lib water the pig can tolerate up to 2% or more of salt in the diet.

The first signs are inappetence and whenever this occurs in a pen of apparently healthy pigs or an individual always check the water supply first.

Clinical signs

The very early stages of disease are preceded by inappetence and dehydration. Whenever a sow or group of pigs are not eating always check the water supply first. Signs develop within 24 to 48 hours.

The first signs are often pigs trying to drink from nipple drinkers unsuccessfully.

Nervous signs then develop with fits and animals wandering around apparently blind.

Pigs show signs of meningitis.

Often a pig walks up to a wall, stands and presses its head against it.

Incoordination.

One sign strongly suggestive of salt poisoning is nose twitching just before a convulsion starts.

Mortality is usually high.

Unusual in young piglets.

Diagnosis

This is based upon the clinical signs and lack of water. Examination of the brain histologically at post-mortem confirms the disease.

Aujeszky’s disease, swine fever, streptococcal meningitis and glässers disease all produce nervous signs. The condition might also be confused with middle ear infection but this only affects one individual rather than a group of pigs.

READ ALSO: Danger of Early Iron Injection in Piglet

Prevention

It must be a daily routine to check that all sources of water are adequate free flowing and available.

Treatment

The response to treatment is poor particularly if pigs have developed fits.

Rehydration of the pig is important and this can be achieved by dripping water through a flutter valve into the rectum or allowing water to drip onto the tongue from a hose pipe.

READ ALSO: 3 Ways To Increase The Weight Of Pig

An alternate technique is to inject sterile water at body temperature into the abdominal cavity. This technique requires veterinary advice and direction.

Click HERE to join our WhatsApp group

There’s no question that newborn piglets are more susceptible to iron deficiency due to inadequate iron stores at birth and rapid growth rate before weaning. But little research exists on just how much iron is needed and the best time to administer iron injections.

Research at Kansas State University took a deeper dive into this subject in an attempt to build the amount of information available on this important topic, said Joel DeRouchey, professor of swine nutrition and management at Kansas State University, during a SowBridge seminar hosted by the Iowa Pork Industry Center on Wednesday.

What is the ideal dosage of iron for piglets?

The researchers evaluated the effects of increasing the dosage of iron in newborn piglets on suckling and subsequent nursery performance and iron status on 336 newborn pigs utilizing DNA genetics. A total of 28 litters were evaluated over a 63-day study.

On the day of processing, approximately three days after farrowing, six barrows and six gilts within each litter were allotted to one of six treatments including a negative control with no iron injection, and GleptoForte™ iron injections at 50 mg, 100 mg, 150 mg, 200 mg and a 200 mg + 100 mg booster at day 11 post-birth.

Weights and blood samples were evaluated throughout the study. Hayden Williams, a Ph.D. graduate student who led this research, said from birth until weaning, the 100 mg injection of iron maximized growth performance, but the 200 mg iron injection provided the greatest iron blood status for the pig when entering the nursery.

READ ALSO: 3 Ways To Increase The Weight Of Pig

During the nursery phase, the 200 mg iron injection maximized growth performance and blood status, Williams said. Little difference was observed between doses of 150 mg and 200 mg.

The researchers also discovered that the 100 mg booster did not provide a growth performance benefit in either farrowing or nursery, but did result in greater hemoglobin, Hct and serum iron at weaning as compared to the 200 mg injection alone.

Feeding nursery diets that included 110 ppm of added iron sulfate restored blood iron status in the pigs that received no or low levels of injected iron at processing by the end of the nursery period.

“But the poor growth performance couldn’t be compensated,” DeRouchey said. “We didn’t capture that back by feeding nursery diets with iron sulfate.”

When is the best time to give iron injections?

Most producers give iron injections ranging from 2 to 6 days after birth. Researchers decided to evaluate the effects of iron injection timing after birth in newborn piglets on suckling and subsequent nursery performance iron status.

The team evaluated 324 newborn, DNA-sired pigs in 27 litters. Two days after birth, six barrows and six gilts within each litter were allotted to one of six treatments in a completely randomized design. Treatments were arranged with increasing age of newborn pigs each receiving a single, 200-mg injection of GleptoForte™ iron.

One group received no iron, the other five groups received the iron at 2, 4, 6, 8 and 10 days after birth. Pigs were weighed and blood samples were evaluated.

From birth until weaning, the 200 mg iron injection provided the greatest growth performance on day four and day six, Williams said. The greatest blood iron status was realized on day six.

During the nursery phase, Williams noted that the 200 mg iron injection on day four or day six provided the greatest body weight at the end of the nursery phase. They did not find any evidence of difference in blood iron status in the nursery.

What does the research recommend?

The 200 mg injection of iron provided the best growth response, DeRouchey said. He noted that they did not test levels above 200 mg, however he is confident that 200 mg is an adequate level to get optimal results given the booster injection provided no further benefit, but more research should be done to confirm this finding.

“Some pigs receive iron earlier in life, but it’s important to review your SOPs and protocols,” he said. “We need to minimize how many pigs get iron too soon after birth. Based on the data, we give up growth performance by giving them iron too soon. The research shows days four and six are an optimal time to give your piglets the iron they need.

Click HERE to join our WhatsApp group

One thing every farmer should understand is that attaining desirable market weight in pig requires getting their nutrition right,  Increasing the weight of a pig requires giving it the right food. If the pig doesn’t gain weight as fast you’d like, you should reduce its fiber intake while adding fat and sugar to its diet. Choosing the right protein and grain sources are also important elements of making your pig gain weight. Beyond making the right dietary choices, keeping your pig healthy and housed comfortably will encourage weight gain.

The 3 ways of increasing the weight of your pig are

  1. Feeding Your Pig Properly
  2. Feed your pig food that is low in fiber. Since fiber takes more energy to digest, the pig will end up expending more calories when eating fiber that it would when eating a less fibrous food. In other words, a high-fiber diet will reduce the amount of calories that the pig absorbs and turns into fat.

Avoid feeding your pig soy hulls, wheat midds, and distillers dried grains with solubles (DDGS).

  1. Give your pig feeds with a high fat content: Fat in pig feed comes from poultry, pork, tallow, vegetable oils, and blended animal or vegetable fats. The type of fat that is included in your pig’s feed has little impact on the weight gains it will make. Feed your pig whatever high-fat feed that it finds most palatable, and you find most affordable.

Skim milk, yogurt, and dairy are also foods that can increase pig fat.

Sweet foods with high sugar content — donuts, candy, and cupcakes — can also rapidly increase your pig’s weight.

  1. Select a protein source: Tankage (animal feed made from residue left behind from the tanks in which animal carcasses were rendered) and meat scraps are two good sources of protein. Soybean oil meal is another option. Give your pig a mix of many types of protein. See what the pig likes best, and feed it primarily that type of protein.

Combining soybean meal with a corn diet will provide your pig with well-balanced amino acid levels.

  1. Choose a grain for your pig. Whatever you choose, 50% of your feed should be yellow corn. The remainder of your pig’s feed should be a mix of barley, wheat, and sorghum. Feed your pig various grains and see which it likes best. Use the pig’s favorite grain in abundance in order to increase its weight.

Avoid bird-proof sorghums, as pigs find them less desirable than regular red or white sorghum.

  1. Increase the amount of food the pig is eating. Weight gain occurs as a result of ingesting excess calories. If a pig is not eating enough food, it will lose weight. If a pig eats over and above the caloric volume needed to maintain its current weight, it will increase its weight.

Increase the pig’s nutrient intake as you increase the amount of food it eats. Take your pig to the vet or nutritionist for blood work and a nutritional analysis. The vet will be able to tell you if your pig is suffering a nutritional deficiency, and what supplements can correct it.

Adequate nutrient intake helps your pig absorb calories more efficiently.

Vitamin B12 is an important addition to your pig’s diet. It can help improve feed intake, as well as reduce stress levels and prevent disease in your pig. B12 injections are the best way to go. Talk to your vet about how much B12 your pig should receive.

  1. Add supplements to the pig’s diet. You can choose to add fat or protein in order to help your pig pack on pounds. Fat and protein supplements (sometimes labeled as energy supplements) are available in many varieties, with fat and protein contents ranging from 30% up to 70% or more. Some have high protein and high fat, while others are high in either fat or protein.

Decide how much weight you want to increase your pig by, then incorporate fat supplements or fatty foods into the pig’s diet.

Typically, pigs under 150 pounds receive half a pound to one pound of supplements. For pigs over 150 pounds, you can add one to one and a half pounds of supplements.

Always follow the directions on the package of your supplement product.

Young pigs need about 17% of their diet to be protein. Older pigs should get a diet with about 15% protein.

  1. Make food more appealing. Palatability enhancers are toppings that you apply to your pig’s feed in order to make the food taste better. If your pig enjoys what it’s eating, it will eat more of it, thus increasing its weight. Try several palatability enhancers and see which pushes your pig to eat the most.

Add water to the feed. When your pig’s feed is wet, the food will be softer and the pig can more easily ingest it. Pour some water over your pig’s feed in order to turn it into a watery mush or paste.

If your pig really likes one feed, but dislikes another, you should regularly purchase the one it likes. Tasty feed will be consumed in greater quantities and with greater enjoyment than feed that the pig doesn’t like. This will lead to rapid weight gain.

Give your pig a variety of foods. Like people, pigs get bored of eating the same thing over and over.

  1. Adjusting Your Pig’s Environment

Ensure your pig has enough space. If a pig’s facilities are inadequate for its needs, its appetite will decline due to stress. Pigs should be given between 20 and 50 square feet of space within their pens, and at least 100 square feet of outside pasture in which to move around in.[15] There are several ways to give your pig more space, such as:

  • Removing pigs from the pen and putting them in a separate, larger enclosure
  • Selling pigs until you have a population that can thrive within the confines of the pen
  • Expanding the size of the pig pen
  1. Ensure your pig can access its food. If your pig is having a hard time getting to the feeder or trough, take steps to help it. For instance, if your pig is being fed with several others in a communal pen, it might be pushed aside by larger, more dominant pigs. If you only keep feed out during limited windows of time, some pigs might be eating less than others.

Consider adding a feeder, or providing extra bowls of feed for pigs that aren’t at the weight they should be.

Always give your pig fresh water. Even if you add water to your pig’s feed to soften it, you should also provide a bowl or trough for water. Change your pig’s water regularly. Water should be cool but not cold. Pigs need 2-3 pounds of water for every pound of feed they consume.

  1. Regulate your pig’s temperature. If the weather is hot (95 degrees Fahrenheit or above), your pig will be disinclined to eat. Humidity levels as well as temperature affect the pig’s tendency to eat. Low humidity makes pigs more interested in eating.

Keep the air in your pig pen circulating by opening the windows or doors. Introduce fans or a large inflatable pool into the area your pig lives. Ensure it has plenty of shade.

Ensure your pig is not too cold. If the temperature of your pig pen is below 60 degrees Fahrenheit, your pig might be too cold to eat. Ensure your pig pen is well-insulated against winter. Use a heater to keep the temperature in your pig pen between 60 and 75 degrees Fahrenheit.

  1. Keeping Your Pig Healthy,

Monitor your pig’s health. Sick pigs will not be inclined to eat much. Even when a sick pig does eat, its illness causes nutrients and vitamins to be expended at higher rates than normal as the pig fights off the infection or disease afflicting it.

Check your pig’s temperature with a rectal thermometer. The temperature should be around 102.5 degrees Fahrenheit.

If your pig has a fever, take it to the vet immediately.

Look for signs your pig is ill. If your pig is acting lethargic, squeals painfully, has diarrhea, or does not eat, it may be ill. There could be one or many causes for your pig’s illness, including viruses, parasites, or poor nutrition. Take it to a qualified veterinarian for a checkup.

  1. Deworm your pig. Deworming regularly (every thirty days) will keep your pig healthy and remove the parasites that steal nutrients and calories away from your pig. You don’t need to take your pig to the vet in order to deworm it. Rather, you can purchase a commercial deworming medication at your local farm supply store and administer it directly to your pig. Most require a three-day feeding cycle. Be sure to follow the directions with your pig’s deworming medicine.

You do not need assistance to administer the deworming medicine. Simply add it to the pig’s feed, typically at a ratio of one cubic centimeter per 50 pounds of body weight. In other words, if your pig weighs 100 pounds, you’ll probably add two cubic centimeters of deworming medicine. However, always use the prescribed dosage when administering any medicine to your pig.

  1. Check your pig for injuries. If your pig has recently had an operation or been injured, it will not want to eat much. Check your pig’s legs and belly for sores, and check its feet for sharp objects. Patch up small wounds. If you see serious injuries, take your pig to the vet as soon as possible.

You should also bring your pig to the vet before introducing him or her to the rest of your pigs. This will ensure the pig doesn’t introduce parasites or illnesses to the other pigs.

If you observe any strange behavior such as lethargy, staggering, poor appetite, it may be injured internally or ill. Bring your pig to the vet for an examination.

Pigs should get a checkup from the veterinarian at least once each year.

Click HERE to join our WhatsApp group

How A Rabbit’s Digestion Works

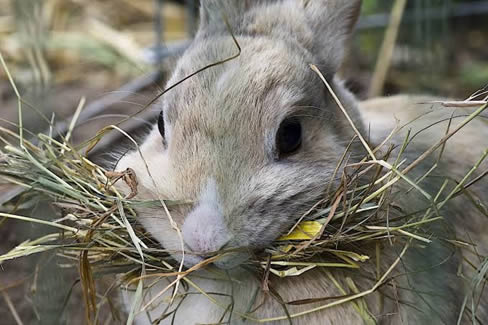
Even if you’re a brand-new rabbit owner, you may have noticed that rabbits have very different dietary requirements than people. Being dedicated herbivores, all rabbits have a digestive system that is designed specifically for feeding on raw plants.

But do you know how rabbits accomplish this entirely raw diet? It’s mostly due to a complex system of gut flora. These bacteria have developed a beneficial mutual relationship with rabbits (source) that helps our fuzzy friends to digest otherwise tough and resistant plant matter.

While a rabbit’s digestive system is truly complex and extraordinary, it’s also extremely sensitive to things that humans have no problem eating. What’s more, the consequences of indigestion for a rabbit can be very serious, with gastrointestinal stasis being a common cause of trips to the vet.

Also Read Common ways to manage bacteria diseases in poultry

Because of this, it’s important to consider how anything you feed your rabbit is likely to affect their entire digestive system. This includes the nutritional value and effect on gut bacteria, and likelihood of producing gas. The best foods for rabbits are those that are easy to digest, high in beneficial nutrients, and without any significant gas producing properties.

What Do Rabbits Normally Eat?

According to the Veterinary Centers of America, Inc., a rabbit’s usual diet should consist of the following foods:

High-quality grass hay

Leafy green vegetables

Clean, freshwater

Keeping your rabbit healthy really can be as simple as following this list. Fresh hay should form the bulk of your rabbit’s diet, and always be available in abundance. The same goes for water:

Let’s look at a list of the most common foods that absolutely should NOT feed your rabbit:

11 Foods That are Dangerous for Rabbits

  1. Grains and Grain Products

This includes all breads, crackers, and cookies. Rice, wheat, oats, and more are not only too full of carbohydrates for your rabbit, but can cause dangerous digestive blocks, as well. That said, your rabbit will likely try to nibble on any sweets that you have; don’t let them.

Also Read Best Ways to Avoid Mortality in Brooding

  1. Beans

Raw or cooked, anyone who has eaten beans knows that they can cause indigestion and gas. While this is okay in humans, it can be fatal for rabbits. Peas are included in this, too  because they’re in the same family as many beans, they can also cause gas or blockages that are harmful or fatal to your rabbit.

  1. Potatoes

Humans are unable to eat raw potatoes. And while rabbits may be able to digest these tubers in their raw state, that doesn’t mean that they should be eating them. In fact, a toxic compound called solanine makes green potatoes potentially deadly.

Even if a potato is entirely ripe and free of the green that indicates toxic solanine, its nutrient value makes it unsuitable for rabbits. Consisting almost solely of carbohydrates in the form of complex starches, potatoes can also lead to GI stasis via negatively impacting your rabbit’s gut bacteria.

  1. High Sugar Foods

Any food that is high in refined sugar, including all processed foods, should be entirely avoided in your rabbit’s diet. While bunnies have a natural sweet tooth, they can’t tell the difference between sugars that are okay for them (like fruits) and sugars that can ruin their gut health. Stay away from all cookies and candies for your rabbit’s diet, no matter how much they beg you for them.

  1. Cooked Foods

As herbivores, rabbits have evolved to be able to digest large quantities of raw plants. However, this adaptation has also made them sacrifice the digestive enzymes necessary for eating cooked foods. Therefore, if a rabbit eats cooked foods, it can lead to serious gastrointestinal distress by upsetting their delicate gut bacteria.

  1. Chocolate

Theobromine is one of the compounds in chocolate that makes it so satisfying and habit-forming for humans. However, rabbits do not have the necessary digestive enzymes to break theobromine down – making it a dangerously powerful stimulant to them. If your rabbit eats chocolate while you’re not looking, call your vet immediately.

  1. Nuts

Rabbits thrive on a diet that is high in fiber and carbohydrates, with a small amount of protein and very little fat. Because nuts are so fatty, they can easily disrupt your rabbit’s digestive system. If a blockage occurs because of this, it can be harmful or fatal to your rabbit’s health.

  1. Onions, Garlic, and Other Alliums

Any of the members of the pungent-smelling allium family can make your rabbit very sick if eaten; rabbits don’t have the digestive enzymes necessary to process them. Generally, you won’t have to worry about this one – rabbits hate the smell of garlic and onions and will gladly avoid them.

  1. Anything Caffeinated (Coffee, tea, etc.)

If you’ve ever drank too much coffee, you know that being overcaffeinated can be an unpleasant experience: Anxiety and an accelerated heart rate are common problems for the coffee addict.

While humans can handle this to some degree, rabbits are much more sensitive. The “buzz” from coffee or tea can increase their heart rate to harmful (or even fatal) levels, meaning that you should never feed your rabbit anything caffeinated.

  1. Avocados

This ever-popular guacamole ingredient is rich and fatty, making it completely unsuitable for a rabbit’s diet. Fat should comprise the smallest portion of any rabbit’s diet, so avoid feeding them things like avocados, oils, and nuts.

  1. Fruit Seeds

Apples and watermelons are the most common culprits of popular rabbit treats with toxic seeds. When giving your rabbit fruit as a treat be sure to chop up and thoroughly inspect it, carefully removing all seeds.

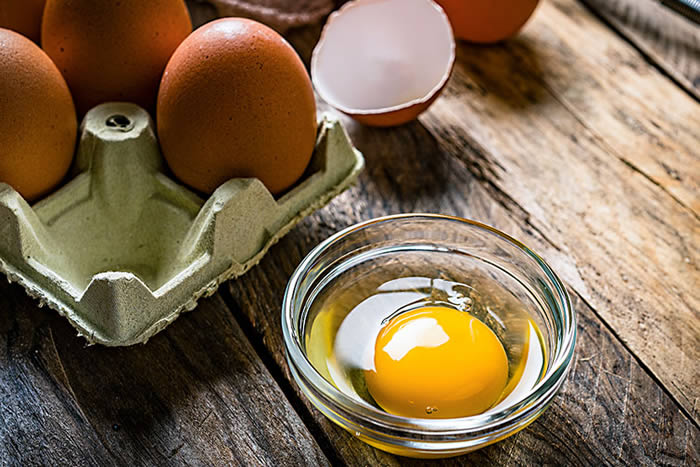
People sometimes use raw eggs when making homemade ice cream, mayonnaise, Caesar salad dressing, hollandaise sauce, eggnog and meringues. However, it is not save to eat raw or undercooked eggs.

Raw eggs have very comparable health benefits to cooked eggs. They share mostly the same nutritional profile, same vitamins, same health perks, etc. However, raw eggs come with some unique risks that generally make them unsafe to eat:

  1. Risk of Disease

That’s right. Raw eggs come with the risk of salmonella, a bacteria that can infect your digestive tract. Eggs can get contaminated by salmonella either because the hen that laid the egg was infected with the bacteria, or because the egg was laid in a dirty environment already containing salmonella. But cooking it to a temperature of at least 160 degrees F (which happens through most cooking methods) will kill any lingering bacteria, which is why cooked eggs are safe and raw ones typically are not.

Contracting salmonella isn’t usually life-threatening, but it’s a serious condition that could cause diarrhea and sometimes requires hospitalization in more severe cases. (And if you’ve ever had salmonella, you know it’s absolutely miserable.)

While the odds of contracting salmonella from raw eggs is pretty low (about one in 20,000 eggs is believed to be infected), the USDA stresses that no one should eat foods made with raw eggs—especially pregnant women, infants, and anyone with a compromised immune system.

The exception: If you’re preparing a food that’s traditionally made with raw eggs (like eggnog), the Centers for Disease Control and Prevention (CDC) recommends using pasteurized eggs, which have been treated to kill most bacteria in the egg.

Also Read Common ways to manage bacteria diseases in poultry

  1. It could make you deficient in biotin

Consuming raw eggs has also been linked to biotin deficiencies. Biotin is a type of B vitamin and can bring major beauty benefits, including healthier hair and nails. Raw egg whites contain a protein called avidin, which binds to biotin and thus block absorption. (Cooked egg whites do not have avidin.) However, you’d have to eat a LOT of egg whites every day in order to become deficient, so that’s more of a secondary concern to the salmonella risk.

The benefits of fully-cooked eggs

Don’t eat raw eggs or foods that contain raw eggs, unless you’re willing to risk salmonella. Thankfully, eggs are safe (and super healthy!) when fully cooked. In fact, cooked eggs have a lot of health benefits:

  1. They’re full of healthy fats

You don’t have to be a ketogenic diet follower to know that eggs—raw or cooked—are a fantastic source of healthy fats, which help you stay full and satisfied for longer. They even naturally contain a small amount of omega-3 fatty acids (you know, the stuff that’s good for your brain and heart health), with fortified eggs containing even more of the nutrient.

  1. They’re high in protein

Raw eggs have six grams of protein, just like in a boiled egg. Not only is protein a key energy source, but it will help you feel full longer, too. However, keep in mind that a small study found that the protein in raw eggs is less bioavailable (aka less easily absorbed) by the body than the protein in cooked eggs.

Also Read Best Ways to Avoid Mortality in Brooding

  1. The yolks are packed in vitamins A, B, D, E, and K

Egg yolks are very concentrated in nutrients—both when cooked and uncooked. It’s got calcium for strong bones, iron for healthy blood flow, and a variety of vitamins to support your cardiovascular, nervous, and immune systems. And these nutrients don’t exist outside the yolk (so, don’t just eat the whites).

  1. They help protect against heart disease

Eggs—whether eaten raw or cooked—are good for your heart thanks to their phospholipids, which are linked to lowering inflammation and helping protect against heart disease. The yolks in particular are rich in choline, a nutrient that supports brain and heart health.

In Conclusion

Eating raw eggs definitely comes with risks, and the fact remains that you can get nearly all of the same health benefits in cooked eggs. So if you need those raw eggs for something, make sure they’re pasteurized. Or just save yourself some peace of mind and make this vegan cookie dough instead.

Get yourself updated by Clicking HERE to join our WhatsApp group

The top performance indicators to validate an excellent result in brooding are

  1. Uniform growth of birds
  2. Not more than 2% mortality

If you are having challenges in any of these, then you need to check out these ten main tips which can help you avoid unnecessary chicks mortality during brooding.

  1. Antibiotic Injection at Day Old

Early chick mortalities are caused mainly by E. coli and staphylococcal infections . To prevent this, give your chicks Gentamicin injection at Day Old.

  1. Temperature Control

 Temperature control is very important for chicks, especially during the first 3 weeks of life. However, heat may or may not be required depending on the environmental temperature. If it’s too cool, you have to continue providing heat. Below are some negative effects of high and low brooding temperatures.

Effects of High Brooding Temperature: a. Dehydration:The chick’s body is about 70% water. When brooding temperature is high, there is loss of water from the chicks’ body. When about 10% of water is lost, the chick will die from dehydration.

  1. Vent Pasting: When temperature is high, feaces will continue to stack around the vent until the vent is blocked. If this is not attended to, the affected chick will die.

Effects of Low Brooding Temperature: a. Chilling: This is also called brooding pneumonia. When chicks are chilled, their lungs will turn blue and they’ll die. It can also lead to failure of the digestive system.

  1. Smothering: When temperature is low, chicks will huddle together for warmth. They may pack themselves so tight that some will die as a result.

Also Read Common ways to manage bacteria diseases in poultry

Preventing Temperature Problems:

To prevent all these problems discussed above, you need to have a very reliable source of heat, which might be infrared heat lamps, propane gas brooders, bulbs, etc. Also follow the recommended temperature plan for chicks, like the one shown in the table below. However, you should adjust these recommended temperatures according to chicks’ behavior. If the temperature is ok, they’ll be evenly spaced around the pen and will make soft cheeping sound. Cold chicks will huddle together and cheap loudly. If it is too hot, they’ll move away from the heat source and they may pant and/or lay down with wings stretched out. If there is draft they’ll stay away from its path. Monitor all these and correct the temperature accordingly

Another important thing to note is the litter temperature. If the litter is not warm enough, the birds will loose heat when they lie on it. To avoid this, you have to put on your heat source 24 hours before the chicks arrive. This way, the litter will be warm enough when they arrive and you’ll be able to measure and see how high or low the temperature swings during the day and at night. Also remember to measure the temperature of areas furthest away from the heat source. This will enable you to know how to make adjustments so that birds in these locations will not get chilled.

  1. Feed & Water Quality

Fungal and other toxic contaminants in feed can also cause mortality in chicks. If there is excess salt in the drinking water, death can result from that.

Prevention: Monitor your feed and water quality. Buy feed from reputable companies and send a water sample for test – chemical and biological test. If you mix your own feed, use feed ingredients that are free from toxins. Also incorporate toxin binders in the feed. Always ensure that feed and clean water are constantly available. Starving the chicks any of these will result in mortality. Chicks don’t have fat storage and so can’t cope with hunger. There should be enough feeders and waterers for the number of chicks you have. Linear feeding space for the first 2 week should be about 1 inch per chick, then 2 inch/chick after 2 weeks. Provide two 2-gallon waterers for 100 chicks from 0-4 weeks old and two 5-gallon waterers from 4-12 weeks old.

  1. Air Quality

Toxic gases like ammonia, carbon monoxide (CO), high concentration of carbon dioxide (CO2) etc. can lead to mortality.

Ammonia gas is produced as chicks’ droppings decompose. It will build up in brooders with wet litter and poor ventilation and lead to respiratory infections. Its maximum concentration should be less than 25 ppm. CO is a very lethal gas to both humans and animals. It is produced during low oxygen combustion. CO is particularly important to those that use charcoal fire in brooding. Both CO and CO2 can lead to death by suffocation.

Prevention: Good air quality can be ensured by proper ventilation. Some people think that because chicks need warmth, they have to seal up the brooding house. This is wrong because if toxic gases from the litter and heaters can’t escape, they’ll cause problem for the chicks. So, every brooding house need small openings at the top to ensure that fresh air continually comes in and bad air out. This will prevent draft and ensures good ventilation. Draft occurs when air flow comes in direct contact with the chicks while with ventilation, the air flow does not come in direct contact with the birds. Draft can chill and kill chicks. Draft during cold periods can kill adult birds.

To prevent ammonia build up, ensure that the litter remains dry. The litter should be about 3cm thick. Stir it from time to time to keep it dry. Remove any wet spot and caked litters and replace with dry ones.

  1. Routine multivitamins

It is good to give chicks and even adult chickens vitamin supplements routinely. Give it to them whenever they are stressed with temperature swings, transportation, breeding, illness, vaccination etc. This will boost their immune system and help them to cope better with the stress. However, giving multivitamins for a long time at a stretch is not a good practice because of the dangers of vitamin toxicity. Follow the instruction on the multivit’s sachet while giving it to them. If the instruction says give for 3 days at a certain dosage, abide by it.

Where to Buy Multivitamins: You can get a wide range of cheap poultry vitamins from your local market.

  1. Routine Probiotics

Probiotics are the opposite of antibiotics. While antibiotics kill bacteria – both good and bad bacteria – probiotics add and encourage the growth of good bacteria in the gut. Probiotics can also be given during an antibiotic treatment to help replace the good bacteria killed by the antibiotic.

Where to Buy Probiotics:You can get a wide range of cheap probiotics from any reputed company.

  1. Proper vaccination

Birds need vaccination against many diseases, including incurable viral diseases like Newcastle, Marek’s disease, Gumboro, infectious bronchitis etc. Most often, viral diseases are accompanied by bacteria diseases. This is why antibiotics can be given to birds suffering from viral diseases. In such situations, the antibiotics are not meant to treat the viral infection, but to treat the bacterial diseases and help reduce the severity of the disease. Viral diseases can only be prevented through vaccination. Some vaccination like that against Marek’s disease is given at day old in the hatchery. Make sure you buy chicks that have been vaccinated against Marek’s disease at the hatchery.

Read also: Vaccine Failure in Poultry 

  1. Lighting

After 7 days, all birds require a period of darkness so as to avoid m etabolic diseases (esp. of the heart) and leg problems.

Initially, the birds may be exposed to 23-22 hours of light for the first 3-5 days to enable them find their feed, water and warmth. However, the chicks should be given blackout training from a day old to avoid death.

Blackout Training:Chicks should be given blackout training from day old in order to accustom them to sudden darkness. It involves turning the light off for about 5 to 60 minutes daily. Without this, the chicks will likely die in pile-ups on the litter if a blackout occurs.

  1. Overcrowding

When chicks are overcrowded, disease organisms can easily build up and spread fast, leading to deaths. Overcrowding can also lead to mass death when they pile up and die from suffocation. This usually happens when they’re frightened.

Space required per bird depends on the climate (temperate/tropics), type of housing (deep litter, cage, slatted floor) and age of the bird. Chicks should be given at least 0.05m2/bird (0.5ft2/bird) during the first 3 weeks. Increase to 1ft2/chick from 4-8 weeks. A brooder ring with a diameter of 6 feet will cater for 50 chicks.

  1. Smothering in Corners

When you remove the brooder ring, chicks are in danger of piling up at any of the 4 corners of the pen when frightened. A lot of chicks can die that way.

To prevent this, block the corners of the house with cardboards or wire mesh.

Conclusion

Having said all these, it is important to let you know that it is normal for some chicks to die. During the first 3 weeks, it will be normal if 2% of your chicks die. In turkey poults, it is 3%. If mortality is greater than this, you may have to worry and find out why. After 3 weeks, normal mortality rate should not exceed 1% per month; however, you should expect something higher when the birds start laying eggs (for layers).

    1. Get yourself updated by Clicking HERE to join our WhatsApp group

Common ways to manage bacteria diseases in poultry 

Managing bacterial diseases in poultry is crucial to ensure the health and well-being of the birds and to maintain a productive and profitable poultry farm. Here are some common ways to manage bacterial diseases in poultry, along with details on each method:

1. Biosecurity Measures:

Implement strict biosecurity measures to prevent the introduction and spread of bacterial diseases. This includes controlling access to the farm, using footbaths and protective clothing for visitors, and separating new birds from the existing flock.

2. Vaccination:

Vaccination is an essential tool in preventing and controlling bacterial diseases. Consult with a veterinarian to create a vaccination program tailored to your poultry farm’s specific needs.

3. Sanitation and Hygiene:

Maintaining clean and hygienic conditions in poultry houses is vital to reduce the risk of bacterial infections. Regularly clean and disinfect the facilities, equipment, and water sources.

4. Proper Nutrition:

Ensure the birds receive a balanced and nutritious diet to support their immune system. Proper nutrition helps the birds resist infections and recover faster if they do get sick.

5. Antibiotic Use (Under Veterinary Supervision):

Antibiotics can be used to treat bacterial infections, but they should be used responsibly and under the guidance of a veterinarian to prevent antibiotic resistance.

6. Quarantine and Isolation:

Isolate and quarantine any sick birds to prevent the spread of the disease to healthy individuals. Properly manage sick birds and provide appropriate treatment.

7. Water Management:

Monitor and maintain the quality of drinking water to prevent contamination and the transmission of bacteria through the water supply.

8. Temperature and Ventilation Control:

Proper ventilation and temperature control in poultry houses help reduce the stress on birds and improve their overall health, making them less susceptible to bacterial infections.

9. Pest and Rodent Control:

Implement measures to control pests and rodents, as they can transmit bacterial diseases to the flock.


10. Record Keeping and Monitoring:

Keep detailed records of bird health, vaccination schedules, and any disease outbreaks. Regularly monitor the flock’s health to detect any signs of illness early.

11. Improve Farm Management Practices:

Train farm staff in proper poultry management practices to minimize stress on the birds and optimize their overall health.

12. Probiotics and Prebiotics:

Consider using probiotics and prebiotics as feed supplements to promote beneficial gut bacteria, which can help prevent pathogenic bacterial growth in the intestines.

Remember that prevention is often more effective and cost-efficient than treatment. Early detection, prompt action, and collaboration with a qualified veterinarian are crucial for successfully managing bacterial diseases in poultry.